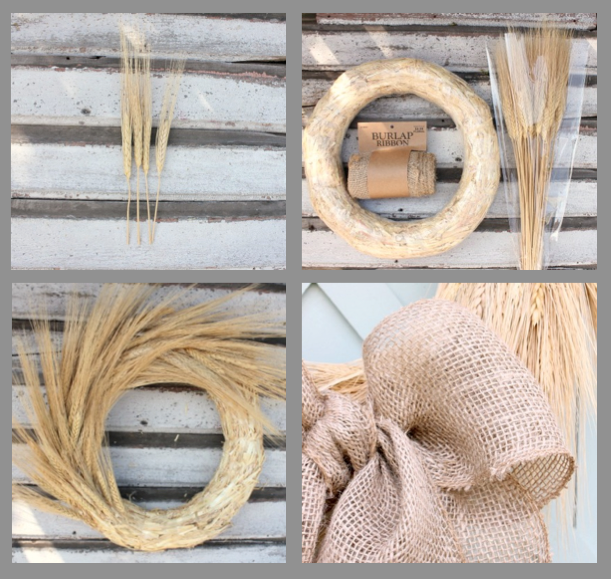
Fall Wheat Wreath:
Supplies:
– straw wreath
– 3 bundles of dried wheat
– burlap ribbon
Directions:
1. Cut the wheat stems to about 4 inches.
2. Insert the wheat stems into the wreath. Do this around the entire wreath.
3. Finish with a burlap bow.
source & photo credit Finding Home
Framed Fall Leaves:
Supplies:
– frame
– leaves
– white construction paper
– tape
Directions:
Choose the frame you are going to use. Tape the leaves to the construction paper, so they do not move. Once that is done place the leaves and paper into the frame. It’s that easy!
source & photo credit Pepper Design Blog
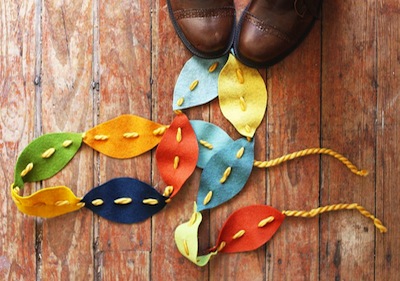
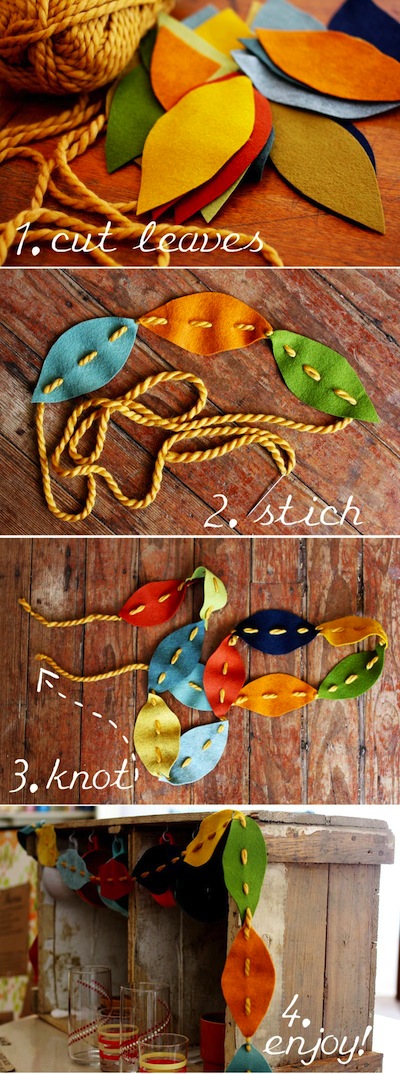
Fall Garland:
Supplies:
– Colorful felt paper
– Yarn
– scissors
Directions:
source & photo credit A Beautiful Mess
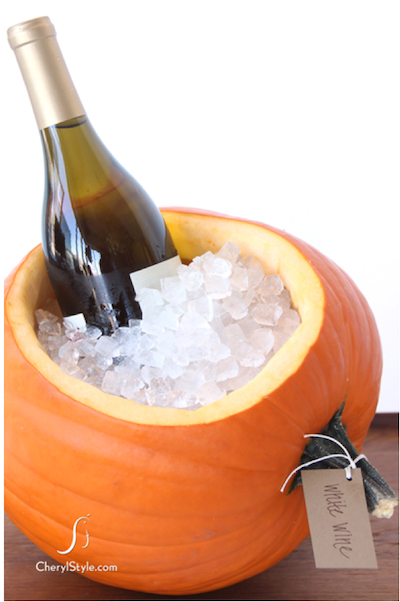
Pumpkin Ice Chest:
Supplies:
– Pumpkin
– Dry erase marker/pencil
– Large serrated knife
– Paring knife
– Large wooden spoon/pumpkin scooper
– Newspaper
– Ice
– Beverage of choice
Directions:
1. Select a long, stretched-out pumpkin that is already resting on its side.
2. Place on top of the newspaper for easy clean up.
3. Trace a large oval across the top 1/3 of the pumpkin using the dry erase marker.
4. Cut along the line at a 45-degree angle with serrated knife
5. Remove the top and scoop out the pumpkins insides. Smooth the interior surface with the paring knife.
5. Wash and pat dry the pumpkin.
6. Add ice and pre-chill your beverage of choice just before guests arrive.
source & photo credit Cheryl Style
Canning Jar Lid Pumpkin:
Supplies:
– String
– Canning jar lids
– Cinnamon sticks
– burlap
Directions:
1. String the canning jar lids together, tying the string tight.
2. Stick the cinnamon sticks in the center along with some leaves cut with the burlap.
source & photo credit Yellow Bliss Road
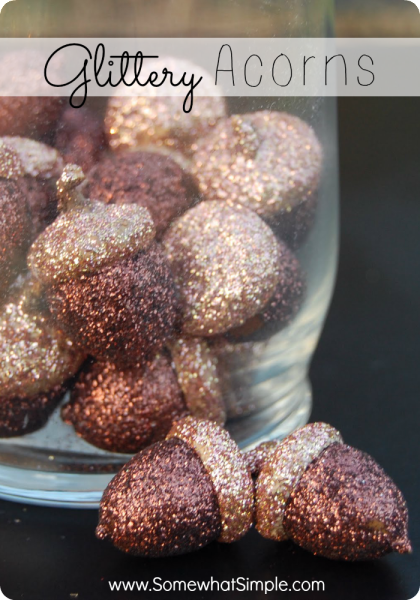
Glittery Acorns:
Supplies:
– Acorns
– Glue
– Glitter
Directions:
1. Apply the glue to the acorns.
2. Roll the acorns through the glitter, until fully coated.
3. Let dry. Once dry you can attach the tops and bottoms (if your acorns are separated)
source & photo credit Somewhat Simple
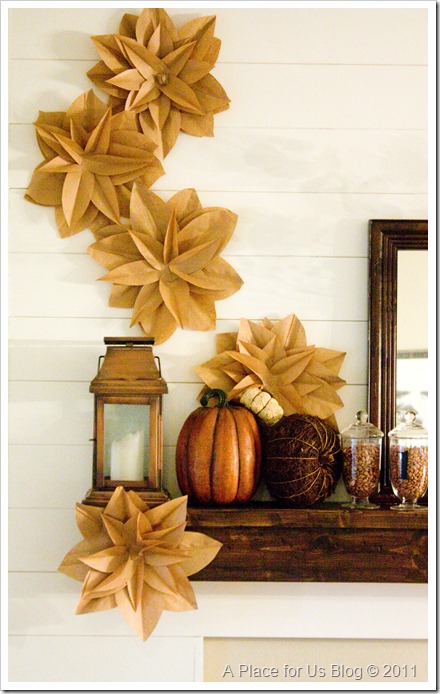
Brown Paper Flowers:
Supplies:
– Scissor
– 6-8 brown paper bags
– Glue stick
– Leaf template (if needed)
Directions:
1. With the bottom flap faced toward you, cut off the bottom of the bag right above the fold.
2. Free hand a leaf shape or use a leaf template. Make the leaf shape as wide as you can. Leave one end flat and the other pointed. Note: as you cut the leaves, smaller parts will fall out. Save these for the section part of the flower.
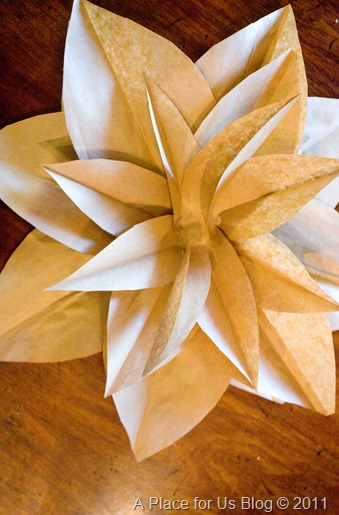
3. Slightly fold the larger leaves in half and glue flat ends together in a flower shape. Repeat until you have a full flower. Stop at about 8 leaves for the large flower.
4. Now get the smaller leaf parts and do the same thing as step 3.
5. Now glue the smaller flower on top of the large one.
source & photo credit A Place For Us


